Yes, you can migrate almost any website to WordPress, whether it currently runs on Wix, Squarespace, Shopify, Joomla, or a custom build. Choose your route by complexity: a DIY import for a simple brochure site, a paid conversion tool for structured content, or a managed, agency-led migration if you have ecommerce, logins, or custom integrations. Before touching anything, take a full backup, spin up a staging install, and build your 301 redirect map.
TL;DR:
- Migrating large, complex sites with many custom post types or integrations requires careful mapping and may necessitate professional help to avoid delays or data loss.
- Building a detailed redirect map and testing all dynamic features on staging before DNS cutover are critical to preserving SEO and minimizing downtime.
- Handling user data and comments involves planning for password resets and ensuring account and comment migration maintains content integrity without security risks.
- A staged domain switch, combined with thorough post-launch monitoring, reduces the risk of critical issues and facilitates quick rollback if necessary.
- Relying on migration professionals can streamline the process, ensure proper rebuilds, and provide ongoing support for security and performance post-migration.
Table of Contents
- Why move to WordPress and what to expect from the switch
- How do you audit your site before choosing a migration path?
- Pre-migration checklist: get technically ready before you touch anything
- Step-by-step migration process: export, import, rebuild, test
- How do you preserve SEO rankings during a WordPress migration?
- What should you check in the first weeks after launch?
- Migration runbook and security safeguards
- Handling and migrating custom post types and taxonomies
- Migrating user data and comments
- Managing and converting shortcodes and custom functionality
- Strategies for minimising downtime during migration
- Backup and rollback plan in case of migration failure
- Author perspective: the mistakes that actually sink migrations
- How Cloud 9 handles WordPress migrations for established businesses
- Sources
- FAQ
Why move to WordPress and what to expect from the switch
WordPress gives you editorial control that most closed platforms simply don’t offer: thousands of plugins, a choice of hosts, and full ownership of your content and database. You’re no longer locked into one vendor’s ecosystem, pricing tiers, or feature roadmap. If your current platform charges more every time you add functionality, or you’ve hit a ceiling on customisation, that’s usually the moment migration starts paying for itself.
What WordPress does not do is inherit your existing design. Visual layouts, proprietary widgets, and platform-specific animations from tools like Wix or Squarespace don’t transfer. Nor do custom booking systems, membership gates, or bespoke integrations, those need rebuilding with WordPress-native plugins or custom development.
Migration is worth the effort when:
- You need scalability beyond what a closed platform’s plan tiers allow
- Multiple people need editorial access with different permission levels
- You want to connect a CRM, ERP, or finance tool without fighting a platform’s API limits
- Long-term hosting costs on your current platform are climbing faster than your traffic
The trade-off is real: budget time for a design rebuild and accept ongoing plugin and update management as part of the deal. WordPress rewards businesses that treat their website as an asset, not a static brochure, but it does ask more of whoever maintains it.
How do you audit your site before choosing a migration path?
Before deciding whether to DIY this, buy a conversion tool, or bring in a migration partner, you need an honest inventory of what you’re actually moving. Skipping this step is how projects balloon from a weekend job into a six-week fire drill.
- Export your full sitemap and catalogue every URL. Include blog posts, product pages, landing pages, PDFs, forms, and any page with an embedded tool (calculators, quote forms, booking widgets).
- Classify every page as Keep, Merge, or Prune. A structured content audit before migration is standard practice for a reason: it shrinks your migration scope and stops you carrying dead weight, thin pages, duplicate content, orphaned landing pages, into the new site.
- List every integration and third-party tool. Payment gateways, email marketing connections, live chat widgets, review plugins. Each one needs a WordPress-compatible equivalent or a custom bridge.
- Check your current platform’s export limits. Some platforms give you a clean XML or CSV export; others, particularly hosted ecommerce builders, lock content inside a proprietary format with no real export path.
- Flag anything platform-specific that won’t translate. Custom code snippets, platform-only apps, and vendor-locked forms usually need manual rebuilding rather than import.
Following an established CMS migration checklist, backup, audit, staging, data migration, redirects, monitoring, give you a repeatable structure rather than an improvised one. The audit alone often determines your entire approach. A 40-page brochure site with no integrations might genuinely be a weekend DIY job. A 400-page site with a membership area and three connected apps is not, and pretending otherwise is the single most common reason migrations run over budget.
Pre-migration checklist: get technically ready before you touch anything
Nothing about a WordPress migration should start with content moving. It starts with insurance.
Backups first, always. Take a full backup of your current database and files, and store a copy offsite, not just on the platform you’re leaving. Test the restoration process before you need it in anger; a backup you’ve never restored is a backup you don’t actually have.
Set up hosting with staging built in. Choose a host that supports a staging environment and SSL by default, then install WordPress there rather than on a live domain. The official WordPress installation guidance covers the recommended setup steps for both staging and production environments, and following them avoids a surprising number of avoidable errors later.
Build your redirect map now, not at launch. Create a one-to-one spreadsheet mapping every old URL to its new WordPress equivalent. Record existing meta titles, descriptions, and canonical tags alongside each row so nothing gets lost in translation.
Plan the logistics, not just the tech. Before build work starts, confirm:
- Who has DNS access, and who is authorised to change it
- Your downtime window (ideally outside business hours)
- Who signs off go-live, and who is on standby if something breaks
- A rollback trigger: what condition means you revert to the old site
Pro Tip: Keep your redirect spreadsheet as a live working document throughout the build, not a one-off export. New pages get added, old ones get merged, and if the spreadsheet goes stale, your redirect map will have gaps on launch day exactly when you can least afford them.
Businesses juggling this alongside day-to-day operations often find a structured content migration workflow easier to follow than building the process from scratch.
Step-by-step migration process: export, import, rebuild, test
Once the checklist above is ticked off, the actual migration follows a fairly consistent sequence regardless of your source platform. The order matters more than most people expect: skip a step and you’ll be redoing work later.
1. Export your content in the best available format
If your current CMS offers a clean export (WordPress-to-WordPress migrations, Joomla, Blogger, or Tumblr all have reasonably solid export paths), use it. WordPress.org documents dedicated importers for exactly these platforms, covering posts, pages, comments, and categories in one pass.
If you’re moving off a closed site builder like Wix or Squarespace, don’t expect the same convenience. These platforms store content in proprietary formats that WordPress import tools were never built to read. As the team behind Duplicator’s migration guidance points out, WordPress migration plugins are designed to move existing WordPress installations, not to parse a competitor’s builder structure. Attempting a one-click plugin import from a non-WordPress site is where most catastrophic migration failures start; you either get a garbled mess or nothing imports at all. For these platforms, plan on a manual content copy: page by page, field by field, or a paid conversion service that specialises in that specific source platform.
2. Import structured content properly
For content that does export cleanly, WordPress’s built-in importers handle blog posts and pages well. For anything more structured, product catalogues, staff directories, event listings, a plugin like WP All Import handles CSV and XML imports with field mapping, which gives you far more control than a generic importer over how data lands in WordPress’s database.
Whichever method you use, check media import carefully. Images frequently import with broken paths or get dumped into a single folder with no alt text, which quietly undoes years of accessibility and SEO work if nobody catches it.
3. Rebuild the design, don’t expect it to travel
Here’s the part almost every migration underestimates: your visual design does not come with you. Design very rarely migrates cleanly between platforms; you’re rebuilding it, either as a custom WordPress theme or using a page builder like the ones supported through most modern WordPress themes. Treat this as its own project with its own timeline, not a subtask you’ll knock out after the “real” migration work.
This is also your opportunity to fix what was never quite right. If your current site has felt dated or the layout has been fighting you for years, a migration is a natural moment to commission a proper design and development rebuild rather than replicating the old layout pixel for pixel.
4. Recreate dynamic functionality with the right plugins
Forms, search, user logins, and ecommerce checkouts all need rebuilding using WordPress-native tools:
- Contact and quote forms typically move to a dedicated forms plugin
- Site search often needs a plugin upgrade over WordPress’s basic native search
- Membership or login areas need a proper membership plugin, not a workaround
- Ecommerce functionality moves to a WordPress commerce plugin, with product data, pricing rules, and payment gateways reconnected individually
None of this transfers automatically. Each one needs testing on its own merits.
5. Test everything on staging before DNS moves
Every dynamic element, forms, checkout, login, search, gets tested on the staging site with documented acceptance criteria: does the form actually send an email, does checkout process a test payment, does login redirect correctly. Only once every item on that list passes should you even think about touching DNS. Migrating a broken checkout to a live domain is far more expensive to fix in public than on staging.
How do you preserve SEO rankings during a WordPress migration?
This is the part that decides whether your migration is a non-event or a six-month recovery project. Get it wrong and you can watch years of ranking equity evaporate in a fortnight.
301 redirects are non-negotiable for every moved URL. Moz’s guidance on redirects is unambiguous: 301 permanent redirects pass authority from the old URL to the new one; 302 temporary redirects do not carry the same weight and risk losing ranking signal entirely. Test your full redirect map on staging before launch, not after.
Metadata has to move with the content, not get regenerated. Copy over existing page titles, meta descriptions, canonical tags, and your heading hierarchy (H1 through H3) into WordPress rather than letting a theme or plugin default reset them. An SEO plugin makes this manageable at scale rather than editing every page by hand.
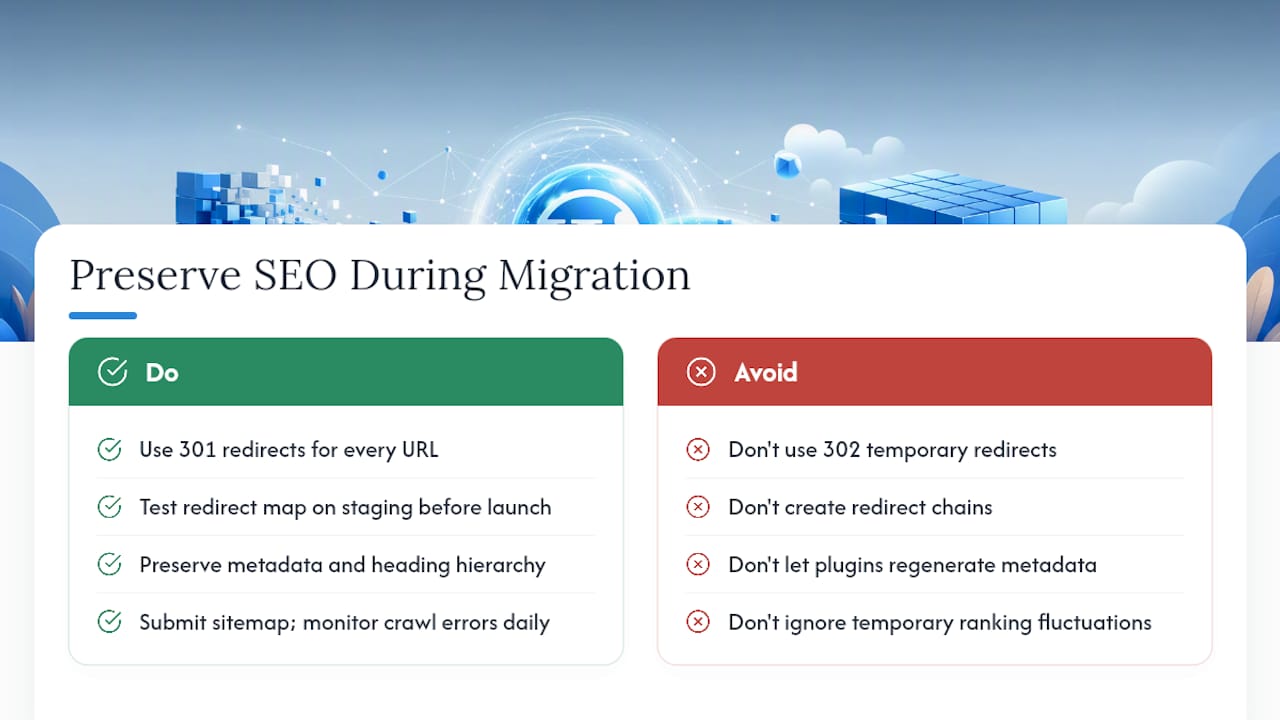
Keep your URL structure as close to the original as you can. Every unnecessary structural change is another redirect rule and another point of failure. Avoid redirect chains entirely, one redirect per URL, not three strung together, since each hop in a chain dilutes the authority passed through and slows crawling.
Once live, submit an updated sitemap to Search Console and watch crawl errors daily for the first fortnight.
What to expect: a temporary ranking fluctuation after any platform migration is normal, even a well-executed one. DNS propagation alone can take up to 48 hours, during which search engines and users may see inconsistent versions of your site. Monitor rankings and organic traffic for 30 to 90 days post-launch, and treat any sudden drop in indexed pages as an urgent signal to check your redirect map, not a reason to panic.
If your migration coincides with a wider push on organic visibility, it’s worth reading up on how a structured SEO strategy compounds over time, since the redirect discipline you build during migration is the same discipline that protects rankings long after launch.
What should you check in the first weeks after launch?
Launch day isn’t the finish line, it’s when the real monitoring starts. Run through this sequence methodically rather than firefighting whatever breaks first.
- Confirm DNS has actually propagated everywhere. Because propagation can take up to 48 hours, check via a hosts file override on your own machine first so you’re testing the new site, not a cached version of the old one.
- Crawl the entire site for 404s. Any orphaned URL that slipped through your redirect map shows up here. Fix it immediately rather than batching fixes for later.
- Test every form, login, and payment flow manually. Don’t trust that staging tests still hold once real DNS and real payment gateways are involved; test again on the live domain.
- Check image and asset loading across key pages. Broken media paths from the import step often only surface once the site is live and being crawled at scale.
- Watch Search Console, analytics, and server logs daily for two weeks, then drop to weekly monitoring through the 90-day mark. Server logs in particular reveal bot and crawler behaviour that Search Console alone won’t show you.
- Run a rapid bug-fix sprint in the first 48 hours. Small issues compound if they sit unaddressed, and a fast, visible fix cycle also reassures anyone internally who was nervous about the switch.
Keep your rollback plan live and ready during this entire window, not just on launch day itself. If something breaks badly enough that revenue or major functionality is affected, reverting to the old site while you fix the problem properly is not a failure, it’s the sensible option.
Migration runbook and security safeguards
Migrations typically run through four phases: plan, build on staging, staged DNS cutover, then post-launch verification. Splitting cutover into stages rather than one dramatic domain switch means you catch problems while traffic is still low and reversible, not after Monday’s inbox fills up with complaints.
Email is the part people forget until it breaks. Cloud 9’s four-phase email domain migration runbook exists specifically because MX record changes during a DNS switchover are one of the most common causes of lost business mail, quotes, invoices, client replies, vanishing into nothing for days at a time. Treat email migration as its own workstream with its own testing window, not an afterthought bundled into the website cutover.
Before go-live, harden the new install:
- Change default admin usernames and enforce strong passwords across every account
- Limit login attempts and add two-factor authentication where the host supports it
- Confirm automated backups are running and, critically, that you’ve tested a restore
- Remove any unused themes or plugins left over from the build phase
Pro Tip: Run your email and website DNS changes on separate days if your host allows it. Isolating the two makes it far easier to diagnose which change caused a problem, rather than untangling two simultaneous failures at once.
Handling and migrating custom post types and taxonomies
If your current site uses structured content beyond standard pages and blog posts, staff profiles, case studies, property listings, event calendars, these need to become custom post types in WordPress, not generic pages with a different template slapped on.
Map each content type from your old platform to its WordPress equivalent before you import anything. A “properties” content type with fields for price, location, and bedroom count should become a custom post type with matching custom fields, not a series of individually formatted pages that break the moment you need to filter or sort them.
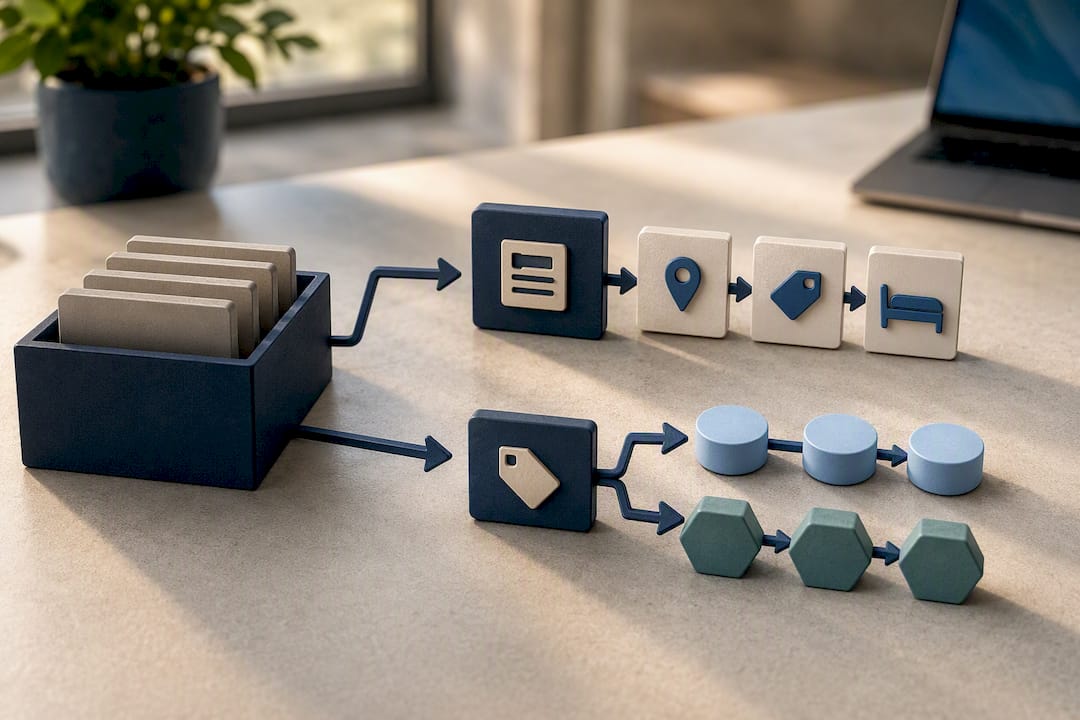
Taxonomies, the categories and tags that organise your custom content, need the same careful mapping. If your old platform grouped case studies by industry and service type, recreate that as two separate taxonomies in WordPress rather than merging them into one messy tag cloud. Get this wrong and you lose the filtering and browsing experience that made the content useful in the first place.
This is genuinely one of the more technical parts of a migration, and it’s where a plugin like WP All Import earns its keep: field-level mapping during import lets you assign old data directly into new custom fields rather than manually rebuilding hundreds of entries by hand. For anything beyond a handful of custom post types, this step alone is often the deciding factor in choosing a managed migration over a DIY approach.
Migrating user data and comments
User accounts and comment histories carry real value, particularly on membership sites, community forums, or blogs with an engaged comment section, but they’re also some of the trickiest data to move cleanly.
For comments, WordPress’s native importers handle basic comment migration from platforms with a standard export format reasonably well, preserving author names, dates, and threading. What often gets lost is any comment moderation history or platform-specific reaction data (likes, upvotes) that doesn’t have a direct WordPress equivalent.
User accounts are more delicate. If your current platform stores passwords in a format WordPress can’t read directly, and most platforms do, users typically can’t log in with their old credentials after migration. The practical fix is to import user records without passwords, then trigger a mandatory password reset email to every migrated account on their first login attempt after go-live. Communicate this to users in advance; nothing frustrates a returning customer faster than a login that silently fails with no explanation.
For membership sites in particular, map subscription levels, billing status, and access permissions carefully before import; getting this wrong risks either locking out paying members or accidentally granting free access to premium content. Test this thoroughly on staging with a handful of real (or dummy) accounts before trusting it with your actual user base.
Managing and converting shortcodes and custom functionality
Shortcodes, those bracketed snippets like
or 
[contact-form] that trigger specific functionality, are a WordPress-specific concept, so if you’re migrating from another platform, you won’t be converting old shortcodes so much as recreating the functionality they represented.
Start by cataloguing every piece of dynamic functionality embedded in your current pages: accordions, tabbed content, pricing tables, embedded calculators, custom sliders. Each one was likely built with platform-specific code or a proprietary widget on your old CMS. In WordPress, these typically get rebuilt using either a page builder’s native blocks or a dedicated plugin, sliders and accordions especially have mature, well-supported plugin options.
If you’re moving from an older WordPress site to a new one, the opposite challenge applies: existing shortcodes need auditing to confirm the plugins that power them are still supported and secure. Migrating a site that leans heavily on shortcodes from an abandoned plugin is a quiet security risk, since unmaintained code is a common entry point for compromise.
Custom functionality, bespoke booking logic, unusual calculation tools, non-standard integrations, is the category most likely to need actual development work rather than a plugin swap. Budget for this honestly during your audit. It’s tempting to assume “there’ll be a plugin for it,” and often there is, but bespoke logic sometimes genuinely needs a developer to rebuild it from scratch inside WordPress’s structure.
Strategies for minimising downtime during migration
The single biggest downtime-reduction tactic is building and testing everything on staging before DNS ever changes. If your staging site is a true mirror of what will go live, the actual cutover becomes a short, largely mechanical event rather than a live-fire debugging session.
Stage your DNS cutover rather than flipping everything at once. Lower your DNS record’s Time to Live (TTL) value a few days before launch; this makes any eventual change propagate faster, since DNS caching respects that TTL window. Combined with testing via a hosts file override beforehand, this shrinks the unpredictable propagation window considerably.
Schedule the actual switch during your lowest-traffic period, evenings or weekends for most B2B and ecommerce sites, and have every team member who might be needed on standby, not just notionally available. Confirm in advance who owns DNS access, who owns the hosting panel, and who has authority to trigger a rollback if something goes wrong; ambiguity here costs far more time than any technical hiccup.
Finally, keep the old site live and untouched (just not publicly linked) for at least a few days after cutover. If a redirect rule is missing or a form silently fails, having the original content still accessible internally makes diagnosis dramatically faster than trying to reconstruct what the old page said from memory or a cached screenshot.
Backup and rollback plan in case of migration failure
Every migration plan needs an honest answer to one question: what happens if this goes wrong? Not “if,” realistically, but under what specific conditions do you pull the plug and revert.
Define your rollback triggers before launch, not during a crisis. Reasonable triggers include: checkout failing to process payments, login system locking out a meaningful share of users, or a critical page returning a server error rather than content. Vague criteria like “if it feels bad” lead to indecision at exactly the moment you need to move fast.
Your rollback mechanism depends on what you changed. If you haven’t touched DNS yet and everything happened on staging, rollback is trivial, you simply don’t cut over. Once DNS has switched, reverting means either pointing DNS back to the old host (assuming it’s still live and unaltered) or restoring your pre-migration backup to a fresh environment and re-pointing DNS there. This is exactly why keeping the old site live and untouched for several days post-launch matters so much: it keeps your simplest rollback option available for as long as possible.
Test your restoration process before migration day, not during an actual failure. A backup that has never been restored is an unverified assumption, not a safety net. Document the restore steps clearly enough that someone other than the person who built the migration could execute them under pressure, because the person who built it may not be the one available at 2am when something breaks.
Author perspective: the mistakes that actually sink migrations
The migrations that go wrong almost never fail on the WordPress side. They fail because someone treated the move as a content copy job rather than an SEO project, and the redirect map got built as an afterthought once the new site was already live. By then it’s damage control, not planning.
The second recurring mistake is underestimating the design rebuild. Teams budget for “moving the content” and treat the visual side as a formality, then discover three weeks in that recreating even a modest layout takes real design and development time. Visual continuity essentially never survives a platform shift intact, and pretending otherwise just delays the honest conversation about timeline.
The third is skipping staging discipline under time pressure. “We’ll just fix it live, it’s quicker” is how a five-minute typo turns into a half-day outage. Acceptance criteria on staging aren’t bureaucracy, they’re the only thing standing between you and finding out a broken checkout form the hard way, in public, with a customer watching.
— Rob
How Cloud 9 handles WordPress migrations for established businesses
If everything above reads like more than your team has time to own alongside the day job, that’s when it may be beneficial to engage a single team to run the audit, the build, the redirects, and the aftercare as a unified project.
A typical engagement follows the same discipline covered throughout this guide: discovery and content audit first, a staged build on a proper environment, a redirect map tested before anything goes live, and 30 to 90 days of post-launch monitoring once it does. Cloud 9’s managed hosting and website care covers the staging environment and ongoing maintenance that keeps a WordPress site secure and fast well past launch day, while the web design and development service handles the part most DIY migrations underestimate: rebuilding your design properly rather than forcing a rough approximation into a generic theme. For businesses running more complex infrastructure alongside the website, cloud migration support extends the same staged, tested approach to the wider systems your site connects to.
If you’re weighing up whether this is a DIY weekend or a project that needs a partner, book a discovery call with Cloud 9 and get a straight answer on scope, timeline, and risk before you commit either way.
Sources
For platform-specific detail beyond this guide, start with WordPress’s own documentation: the official installation guide and the importing content article, which lists supported importers for platforms including Blogger, Tumblr, and Joomla.
For the SEO side, Moz’s guide to 301 versus 302 redirects is the clearest explanation of why redirect type matters for ranking preservation. Shopify’s CMS migration checklist offers a useful cross-platform framework if you want to sanity-check your own plan against a second structure, and Duplicator’s migration guidance is worth reading in full before attempting any plugin-based import from a non-WordPress source.
FAQ
How do I migrate a website to WordPress?
Audit your existing content, back up everything, build on a staging site, import content using WordPress’s native importers or a plugin like WP All Import, rebuild your design as a theme, then switch DNS only after testing every dynamic feature on staging.
What is the best WordPress migration tool?
There’s no single best tool; WordPress’s built-in importers suit platforms like Blogger and Joomla, while WP All Import handles structured CSV or XML data better, and neither works for non-WordPress builders like Wix or Squarespace, which need manual content transfer or a specialist conversion service.
How do you migrate a website without losing SEO rankings?
Build a complete 301 redirect map before launch, carry over your existing meta titles, descriptions, and canonical tags, submit an updated sitemap to Search Console, and monitor rankings closely for 30 to 90 days after going live.
Why are people moving away from WordPress?
Most who leave cite plugin maintenance overhead or security management as the reason, not a fundamental flaw. In practice, businesses moving toward WordPress from closed platforms usually do so for the opposite reason: more control, more integrations, and freedom from a single vendor’s pricing and feature limits.
How long does DNS take to propagate during migration?
DNS propagation can take up to 48 hours, though it often completes much faster. Always test the new site via a hosts file override before making the final domain switch, so you’re not caught out by inconsistent access during the propagation window.